

IceCap K3 200/250 HOB Skimmer Instructions
Getting Started
Just picked up the IceCap K3-200 or K3-250 HOB Protein Skimmer and not sure where to start?
No worries we’re going to walk you through everything step-by-step so you can get it running properly the first time and avoid the common mistakes most people make.
This guide will cover:
- Parts overview
- Assembly
- Installation
- Tuning
- Troubleshooting
What Comes in the Box
Your K3 HOB skimmer includes:
- Collection cup
- Main skimmer body
- Intake and output plumbing
- External pump (DCAIR series)
- Controller
- Airline tubing and silencer
- Mounting hardware
Before starting, lay everything out and make sure nothing is missing.
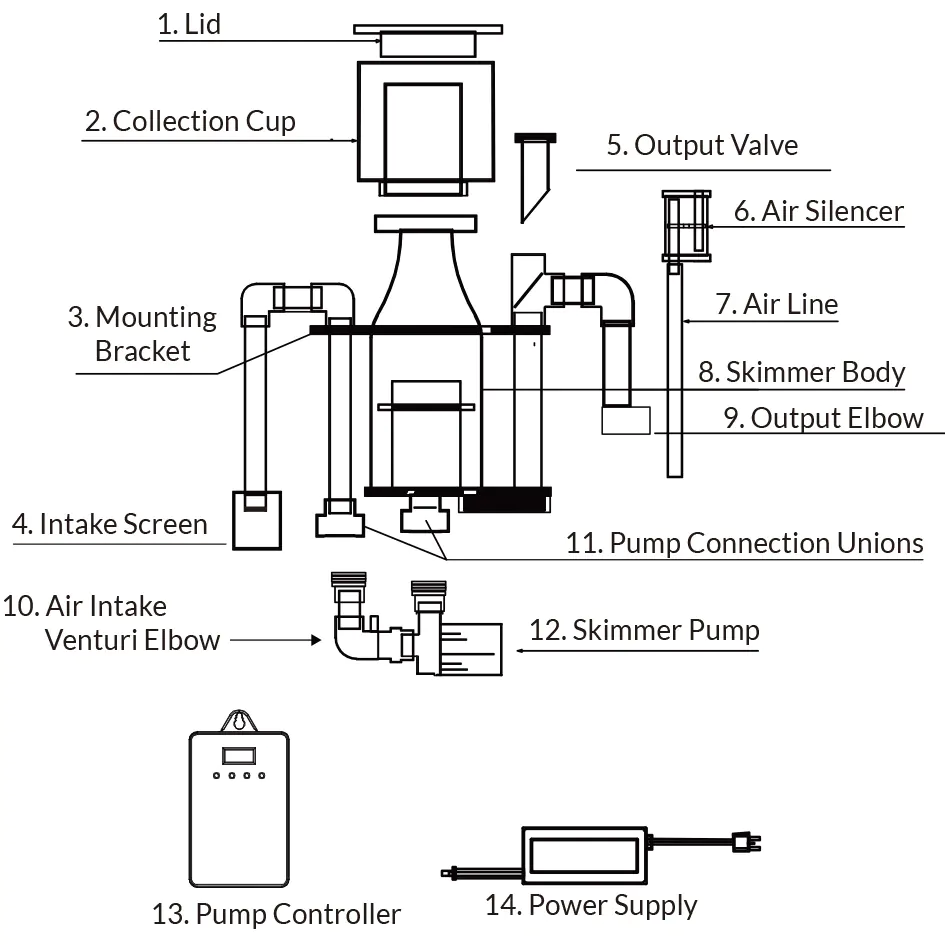
1. Lid
2. Collection Cup
3. Mounting Bracket
4. Intake Screen
5. Output Valve
6. Air Silencer
7. Airline
8. Skimmer Body
9. Output Elbow
10. Air Intake Venturi Elbow
11. Pump Connection Unions
12. Skimmer Pump
13. Pump Controller
14. Power SupplyStep 1 – Assemble the Skimmer & Attach the Pump
For the most part, the K3-200/250 HOB skimmer comes nearly preassembled but you’ll need to properly connect the pump before installation.
Start with the pump connection:
- Locate the two pre-installed O-rings inside the pump unions
- Make sure both O-rings are seated correctly before attaching anything
These are critical for creating a proper seal, don’t skip this check
Attaching the Pump to the Skimmer Body:
- Align the pump unions with the grey female connection nuts at the bottom of the skimmer body
- Hand tighten both connections until snug
(no tools needed just hand tight)
O-Ring Placement (IMPORTANT):
- Blue O-ring → connects to the bottom of the skimmer body
- Black O-ring → connects to the intake plumbing side
Getting this backwards can cause leaks or poor performance
Quick Check Before Moving On:
- O-rings are seated properly
- Connections are snug (not overtightened)
- Pump is aligned correctly


Step 2 Install the Silencer & Connect the Airline
Now that the pump is installed, it’s time to connect the air system that drives foam production.
Install the Air Silencer
- Locate the air silencer
- Insert the bottom tube of the silencer into the holder at the top of the skimmer body
It should sit securely without forcing it
Connect the Airline Tubing
- Take the silicone airline tubing
- Connect one end to the venturi (air intake on the pump)
- Connect the other end to the air silencer
Quick Check Before Moving On
- Airline tubing is firmly connected on both ends
- No kinks or bends in the tubing
- Silencer is seated properly in its holder
Smooth airflow = better skimmer performance


Step 3 Install the Intake Screen & Output Valve
Now we’ll finish setting up the intake and output components so the skimmer can run properly.
Install the Intake Screen
- Take the blue intake screen
- Align the hole with the bare intake pipe
- Gently push it into place until it sits securely
Don’t force it just a firm push until snug
Install the Output (Wedge) Valve
- Locate the output tee on the skimmer body
- Insert the cut side of the output valve into the tee
Make sure it’s fully seated for proper control
Understanding the Valve Position (IMPORTANT)
- The marked section on the valve indicates the open position
- This controls your water level and skimmer performance
Pro Tip:
Use a permanent marker or nail polish to mark the open position for easy reference later
Quick Check Before Moving On
- Intake screen is secure
- Output valve is fully inserted
- You know where the “open” position is
This will make tuning MUCH easier later


Step 4 Fill the Skimmer & Check for Leaks
Before turning the skimmer on, you’ll want to manually fill it and make sure everything is sealed properly.
Fill the Skimmer
- Use aquarium water to fill the skimmer body manually
- Continue filling until water begins to flow back into the tank
This helps prime the system and prevents dry startup issues
Set the Output Valve
- Make sure the output (wedge) valve is in the OPEN position
This is VERY important before powering on
Check for Leaks
- Inspect all connection points:
- Pump unions
- O-ring connections
- Intake and output fittings
Look for any dripping or moisture around seals
Install the Collection Cup
- Once everything looks good, place the collection cup onto the skimmer body
Quick Check Before Powering On
- Skimmer is filled with water
- Output valve is OPEN
- No visible leaks
- Collection cup is installed
Now you’re ready to power it on


Step 5 Mount & Connect the Pump Controller
Now it’s time to safely power your skimmer and connect the controller.
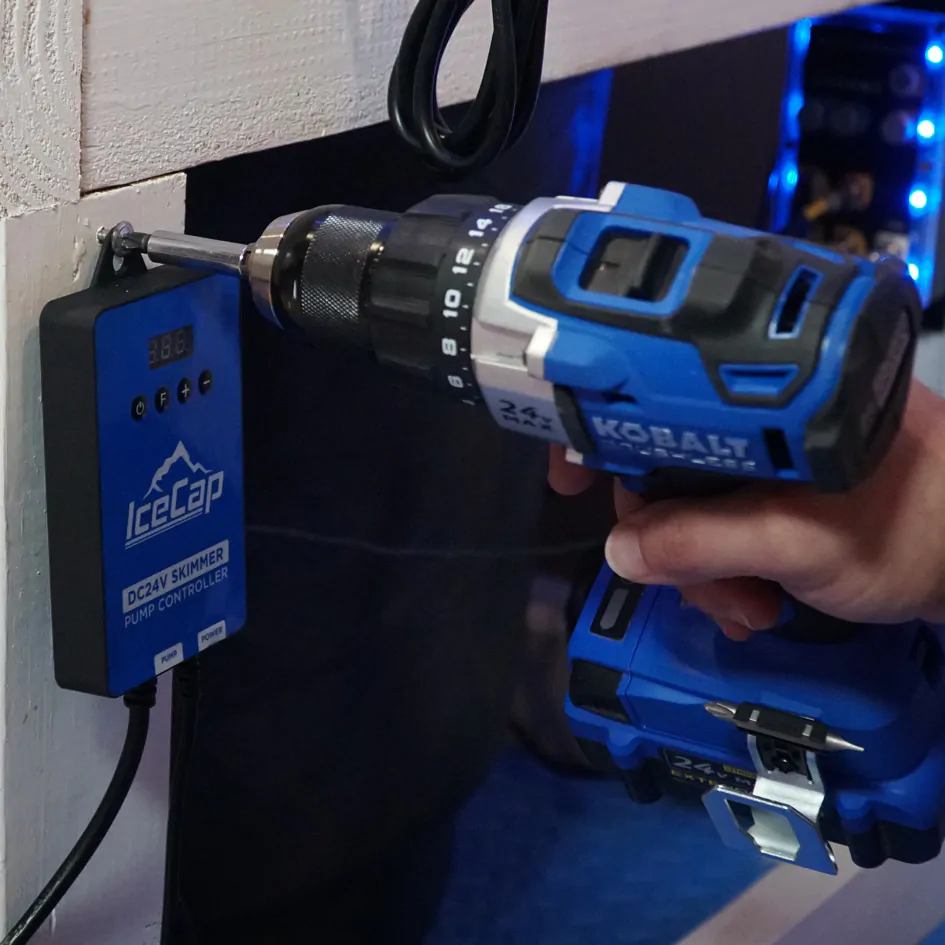
Mount the Power Supply (IMPORTANT)
- Use the built-in mounting clip on the power supply
- Hang it using a screw or hook (not included)
- Keep it out of the way but within reach of the skimmer
Safety First
- DO NOT place the power supply above water
- DO NOT submerge it or expose it to moisture
- Avoid enclosed areas where heat and humidity can build up
Treat this like any other electrical equipment near water
Set Up Drip Loops
- Make sure all cables form a drip loop below the outlet
This prevents water from traveling down the cord into the controller or outlet
Connect the System
- Plug the pump into the controller
- Plug the power supply into the controller
Double check all connections are secure before powering on
Quick Check Before Powering On
- Power supply mounted safely
- Cables have drip loops
- Connections are secure
- No exposure to water
Once confirmed, you’re ready to power up the skimmer

Step 6 Power, Prime, and Operate
Now it’s time to start the skimmer and establish proper flow.
Power On the Skimmer
- Make sure all connections are secure
- Confirm a drip loop is in place
- Plug the power supply into the outlet
Set the pump to power level 10 for startup
Prime the Skimmer (IMPORTANT)
Before allowing air into the system:
- Kink or cap the airline tubing to block airflow
- Let the pump run while the airline is closed
This helps remove trapped air and establish a full siphon
Purge Trapped Air
- Keep the airline closed until:
- No more air bubbles are moving through the skimmer chamber
- Water flow appears smooth and consistent
You’re looking for steady, bubble free water flow
Restore Airflow
- Once the system is fully primed, release the airline tubing
Air will now enter the system and begin foam production
If It Doesn’t Prime Properly
- Briefly suck air out of the intake line to remove trapped air
This helps kickstart the siphon if needed
Install the Collection Cup
- Once the skimmer is running properly, place the collection cup onto the skimmer body
Quick Check
- Pump running at level 10
- No trapped air in the system
- Smooth water flow
- Airline reconnected
- Skimmer beginning to produce foam
Step 7 Break In & Fine Tuning
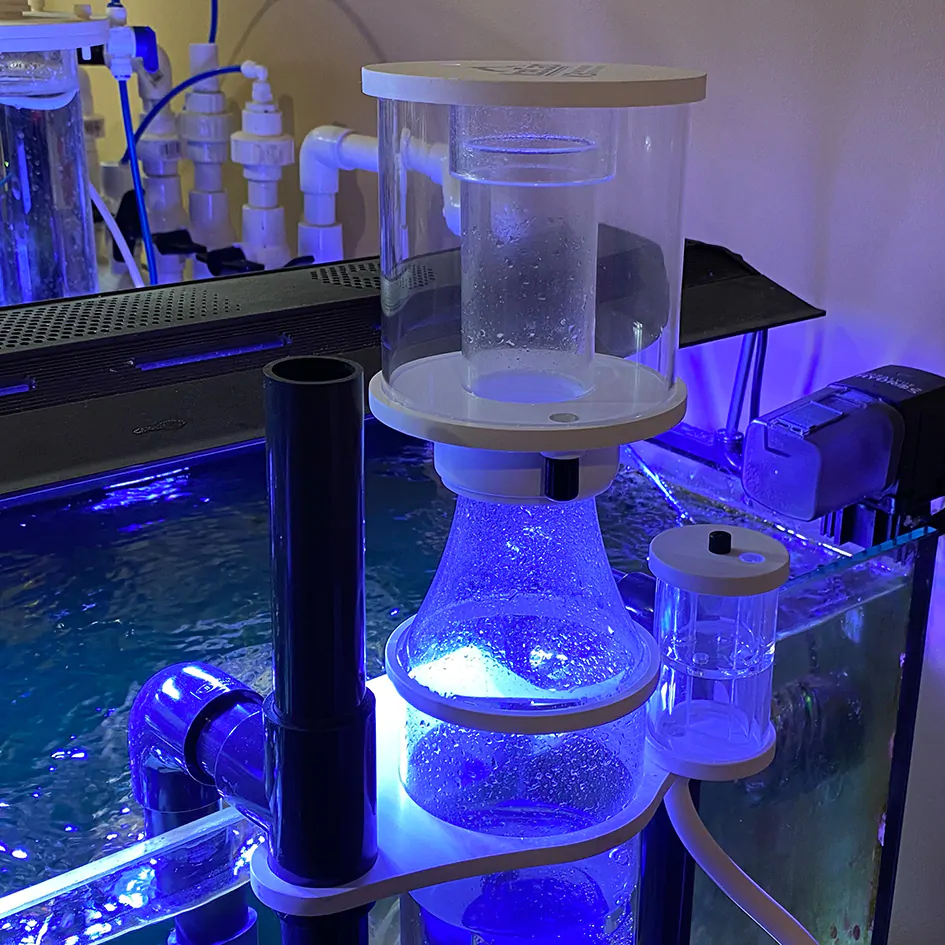
Now that your skimmer is installed and running, it’s time to let it stabilize and dial it in for your system.
Break-In Period (DO NOT SKIP)
- Allow the skimmer to run for at least 2 weeks before making major adjustments
- During this time:
- Factory oils will wash off
- The inner surfaces will begin to develop a biological coating
- Foam production may be inconsistent
This is completely normal every skimmer goes through this phase
Break In Settings
- Keep the output valve mostly open
(look for the position with the two red dots aligned) - Avoid adjusting the skimmer too early
Adjusting during break in can cause:
- Inconsistent skimming
- Sudden overflows
- Poor performance
What to Expect During Break-In
- Microbubbles in the tank
- Thin or inconsistent foam
- Occasional wet skimming
These will improve as the skimmer stabilizes
Fine Tuning After Break-In
Once the break in period is complete, you can begin dialing in performance.
Adjusting the Skimmer
- Slowly turn the output valve clockwise
- Aim for pea sized bubbles at the base of the collection cup
This is your target for optimal skimming
Let It Stabilize
- After each adjustment, wait 24 hours before making another change
Skimmers need time to respond don’t rush it
Wet vs Dry Skimming
- More closed valve → wetter skimmate (lighter, more volume)
- More open valve → drier skimmate (darker, thicker)
You can tune this based on your preference and system needs
Air Bubbles at Output
- Some air exiting the skimmer is normal during break in
- This will reduce over time as the unit stabilizes
Quick Check
- Skimmer has completed break-in period
- Output valve adjusted slowly
- Foam consistency improving
- No sudden overflow

